
ESSENTIALS FOR ROSE GROWING SUCCESS
WINTER ROSE GROWING CULTURE NOTES FOR SOUTH AUSTRALIA
Rose Society of South Australia
We often associate the winter months with cold and wet conditions and a time when we can ignore the garden assuming “nothing much is happening”. However, for rose enthusiasts, this period should be busy with planting new roses, pruning existing roses and the removal of old foliage.
The average daily temperature in Adelaide in June is 16.1°C, in July 15.4°C and in August 16.6°C. These months are usually wet with an average rainfall about 78mm in June, 75mm in July and 68mm in August.
It must be emphasised that temperatures and rainfall vary significantly in other parts of the State during this period with it being colder and wetter in the Adelaide Hills, the South-East and Southern Yorke Peninsula and Eyre Peninsula. Frosts are also common in country areas. Evaporation rates are very low and sunshine hours also decrease in this period.
So, what does this mean for our roses and how can we care for them during winter?
- Watering
This is the only period in the year when rainfall usually exceeds evaporation. Therefore, there is no need to water our roses. The two exceptions which will require water are roses in pots and when planting bare-root roses.Potted roses, particularly those under cover, need to be continually monitored and watered when they become dry. We suggest that you check them every week.Bare-root roses should be given at least a full bucket of water with added Liquid Seamungus when planted to ensure new roots are damp and remove air pockets.
- Mulch
The easiest time to apply mulch is immediately after pruning when rose stems are bare and after the old fallen leaves and cuttings have been removed.Generally, this will be late winter and before the roses begin to produce shoots. New shoots are very fragile and can be accidently broken off by physical activity (such as spreading Mulch).Neutrog’s ‘Whoflungdung’ has emerged as the “Mulch of Choice” for rose growers. An annual application of 5cm of mulch is recommended. While it can be applied immediately around the base of well-established roses (3 years and older) it is advised not to apply mulch closer than 15cms to new, one or two-year-old plants as occasional damage can occur to young basal shoots.


‘Whoflungdung’comes in 20kg compressed bales which are easy to manage. Apply water after application to settle the mulch in and reduce the initial odour which only lasts a couple of days.Mulch significantly reduces evaporation from the surface in spring, summer and autumn, saving up to 40% – 50% of the irrigation otherwise required; it cools the root zone and introduces beneficial bacteria and good microbial activity in the soil.
- Flowering
Depending on the season, some roses can still produce flowers into the month of June. These may not be quality blooms and may have some fungal problems on their foliage. However, they do provide some colour early in winter.
- Fertilising
As roses are not actively growing in winter, they do not require feeding. However, immediately after pruning is completed and the ground has been cleaned up, roses benefit from an application of Neutrog ‘Seamungus’. This is a soil and plant conditioner, manufactured from seaweed, fish, humid acid and manure. It stimulates the roots into strong healthy growth in late winter and early spring. This assists the rose’s growth and ensures emergence from its winter dormancy is sustained by its root mass.


We recommend the use of pelletised Seamungus, as these pellets will breakdown with winter and spring rains over the next few months, enhancing root growth. It is also recommended that Seamungus is applied prior to mulching.
- Pests and Diseases
As roses lose their leaves in winter, it is logical to assume that there is no need to control pests and diseases. In fact, the opposite is true. Once roses lose their leaves and assuming most of the fallen leaves are gathered up and disposed of together with any discarded rose prunings, winter is a great time for pest and disease control.Fungal spores and pest eggs will be present on the bare rose stems, especially in cracks and crevasses. These will also be left on the ground under the plants. As such, they can readily be treated with winter dormancy sprays, for example oil sprays or Lime Sulphur. Copper Oxy Chloride sprays can also be used; however, these can be detrimental to earth worms.Winter spray regime is the most important pest and disease control and will ensure significantly reduced problems in spring.
- Planting New Roses or Transplanting a Rose
Planting is best done in June, July or early August. Allow ample space around each rose. Labels indicate indicative rose size. To allow easier access, rose beds should be no more than two roses deep.Choose an area which receives at least 5 to 6 hours of direct sunlight each day and is free of tree and shrub root competition. Full sun is recommended.If it is a bare-root rose, remove the plant from its bag, shake off any sawdust and soak it in a full bucket of water for at least 6 hours or overnight. You can add either 20mls of Neutrog Liquid Seamungus or Neutrog GoGo Juice to the water, while the rose is soaking. If the new rose has been established in a pot, there is no need to shake the soil off prior to planting.


Dig a square hole at least 30cm square and deep. Place a small handful of Neutrog Seamungus pellets in the hole and cover with 2cm of soil. Trim or remove any broken or damaged roots with sharp secateurs. Broken roots can result in suckers (root stock) which can rapidly dominate. Position your rose in the hole so that the bud union (woody knob in stem where the branches emerge) is approximately 1 to 2 cm above the natural soil level. Observe where the roots fan out from the base of the plant. Remove the plant label from the plant as the label’s tie can quickly “strangle” a plant as it grows.Remove the plant and create a mound (inverted cone of soil) in the hole such that when you place the rose back into the hole (at the correct depth) the base of the rose stem rests on top of the mound and its roots can be “fanned out” evenly from the shank of the plant. Back fill hole to approx. half full and fill the hole with a bucket of water. You can gently wriggle the rose to remove air pockets. Wait until the water drains away, backfill the hole to the natural soil level. The height at which the rose is planted is important. The bud union should be 1 to 2cm above ground level.Winter rains should be sufficient to keep the plant damp until spring when supplementary watering may be required. It takes about 6 – 8 weeks for new roses to become established, therefore do not let the soil dry out completely.Winter is the best time to transplant existing roses. This can be easily done until the rose is about 10 years old. To transplant a rose, use a sharp shovel or spade and dig all around the rose approx. 30cm out from the base to at least a spade’s depth (approx. 30cm). Remove rose and shake off all the soil. Reduce the top of the plant by at least 75%, leaving 3 or 4 canes about 60cm long. Remove any broken or damaged roots. Soak in a tub with Liquid Seamungus for at least 12 hours. Replant as per instructions above.When planting a “standard”, “stem rose” or “weeping rose”, ensure the support (stake or hoop) is placed in the ground prior to planting. Locate the rose on the south-east side of the support which will provide shading to the stem from the hot sun. The rose should be tied to the support with recycled stocking or cloth ties. Do not use wire or non-flexible ties as the stem needs to grow and inflexible ties can choke the stem.
- Rose Pruning
Start with climbing roses, followed by bush roses. Pruning is not a difficult task if you use the right equipment and follow a few simple rules. Pruning in July is recommended and avoid the temptation to prune too early.Wear old clothes, sturdy footwear, a brimmed hat and preferably eye protection and all leather gloves – preferably gauntlets. A high-quality pair of bi-pass secateurs, like Felco or Fiskars is essential. You will also need good loppers and a pruning saw. A pruning saw is ideal for cuts over 2 ½ cm and removing old canes. Make sure your tools are sharp.


For a bush rose, don’t bother looking at the top third to half – this will be removed. Focus on the bottom half of the plant. Ideally, you want to retain strong, healthy, young canes and remove all dead wood, weak twiggy growth and weak branches. If sufficient new canes have grown from the base (water shoots), then you can remove old canes from the base. Also remove canes crossing over into the centre of the plant. Ultimately, you want the rose bush to resemble a cup shape. The outer rim canes should be reduced to one-third to half of their original height and cut to 7mm above an outwardly facing ‘bud’ (eye). Remove all leaves.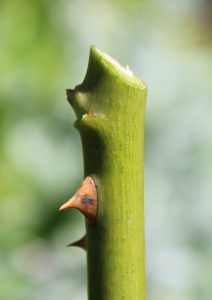

Cut at 45 degree angle
For climbers or pillars, the plant almost “tells you” what to do. First, look at the base of the plant. If it has performed well in the growing season, there will be a number of new canes (these are still green with no side shoots) emanating from the base. These are called “water shoots” and will provide the best flowers in the spring. Therefore, do not remove these.
Secondly, move up from the base of the plant, following older canes (those which were left following the previous years’ pruning). Some of these will have strong new canes emerging partially along the old stem. Others will only have short stems all along the cane. These would have produced the flowers during the previous year.
Determine how many stems you require. As a guide most climbers need at least 12 canes in order to wrap 6 canes onto a trellis on each side of the plant.
For a Pillar Rose, leave approximately 6 to 8 canes growing from the base, then wrap them onto the pillar, half clockwise and the other half anti-clockwise and tie on.
Old foliage should be removed and fallen leaves and pruning remnants placed into green waste.
For beginners, attend local Rose Pruning Demonstrations conducted by the Rose Society and see experts at work.
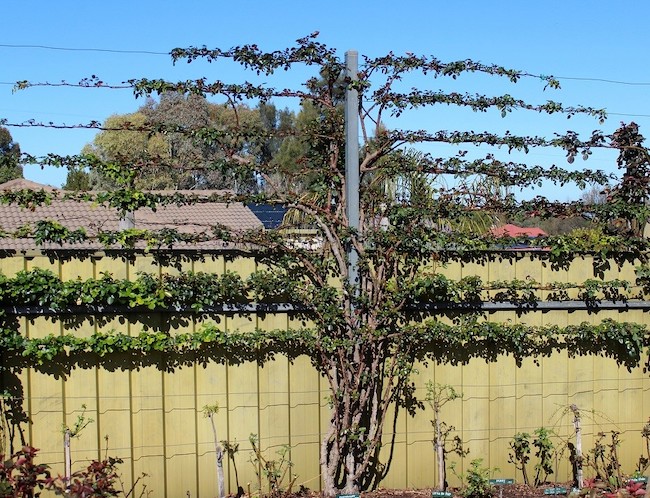
‘Moonlight’ Climber in August
- Other Winter Tips
Check your plant labels are still legible and in place. It is recommended that all roses be labelled and a map is kept showing where roses are planted.